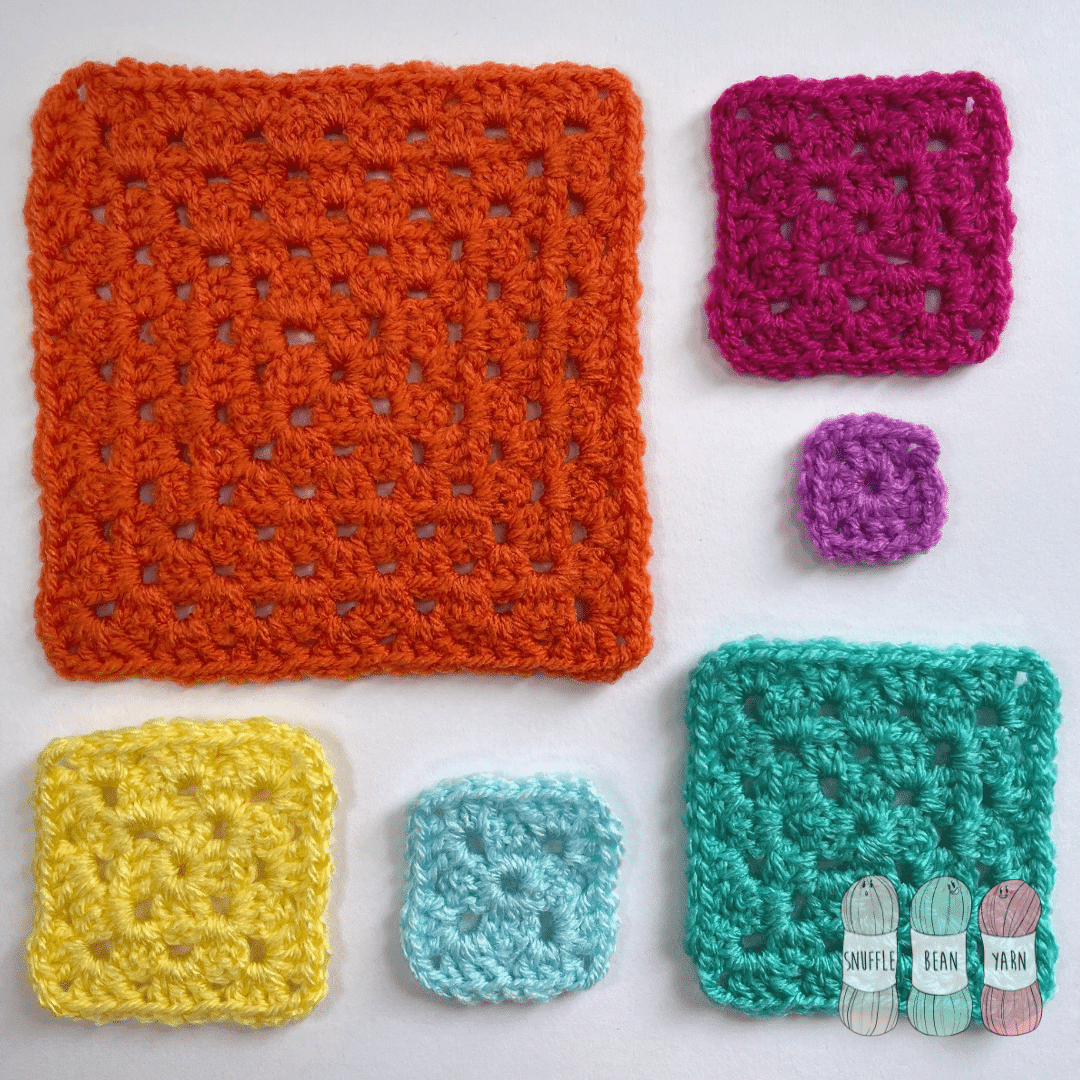
How to Crochet the Perfect Granny Square
Learn how to crochet the perfect Granny Square with me! No more leaning, no more ugly seam, this tutorial shows you how to crochet a Granny Square that stays in shape no matter how big you make it, and is virtually seamless.

Stitches Used:
- ch – chain stitch
- dc – double crochet
- ss – slip stitch
Foundation Round:
- Ch4, join with ss to form ring
Round 1:
- Ch4 (counts as 1dc, and ch2 corner gap)
- Work *3dc, ch*
- Repeat from *to* twice more.
- 2dc into ring, join with slip stitch to 2nd chain from ch4 at start of round.
Round 2:
- ss into ch2 corner gap from row below. TURN
- ch4, 3dc into same 2ch corner space
- *3dc, ch2, 3dc* into next corner space
- Repeat *to* twice more.
- 2dc into next gap, join with ss to 2nd chain from ch4 at start of round.
Round 3:
- ss into ch2 corner gap from row below. TURN
- ch4, 3dc into same 2ch corner space
- 3dc into gap between 2 granny clusters in round below.
- 3dc, ch2, 3dc, in to ch2 corner space from previous round.
- Repeat steps 3 and 4 until you reach corner with ch4 from beginning of round.
- work 2dc and join with ss to 2nd chain of ch4 at beginning of round.
Rest of Square:
- Repeat Round 3, making sure to work a granny cluster into each gap from the previous round, and working 3dc ch2 3dc into each corner space.
Video Tutorial:
If you’ve found this pattern helpful then why not leave a comment and say hi!
![How to Knit the Broken Rib Stitch [Free Written Pattern & Video Tutorial!]](https://www.snufflebean.co.uk/wp-content/uploads/2023/03/broken-rib-social.png)
![How to Knit the “Heather” Baby Blanket [Free Video Tutorial & Written Pattern!]](https://www.snufflebean.co.uk/wp-content/uploads/2024/09/Heather-WordPress.jpg)
![How to Knit the “Louis” Baby Blanket [Free Video Tutorial & Written Pattern!]](https://www.snufflebean.co.uk/wp-content/uploads/2024/08/Louis-1-WordPress.jpg)