How to Crochet the “Ester” Baby Blanket
***You can purchase an INEXPENSIVE AD-FREE PDF of this pattern on Ravelry HERE or Etsy HERE***
This pattern is designed to be a quick and easy make for an experienced beginner.
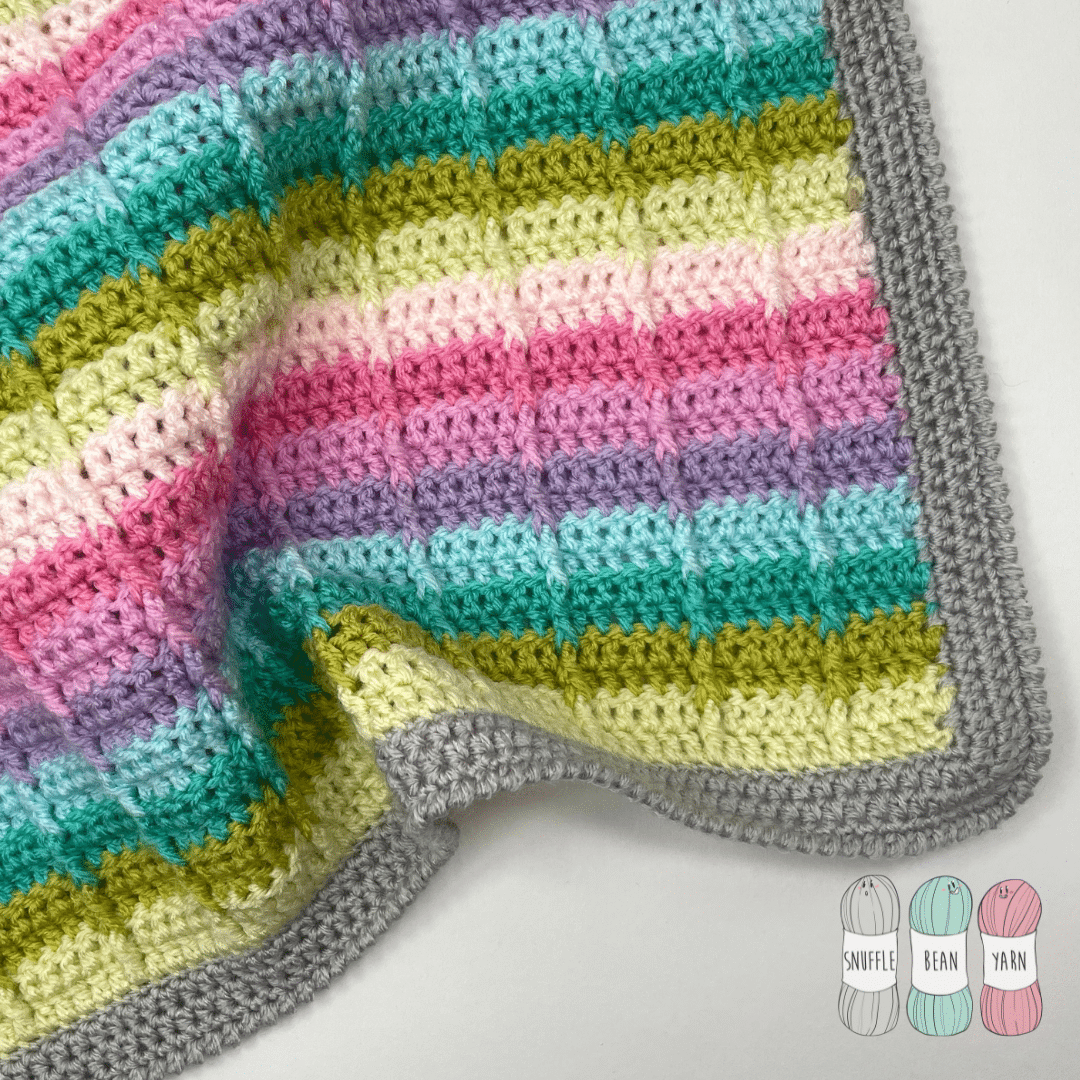
I’ve made the blanket using a Springtime Yarn Pack with a Soft Grey for the border, however the pattern can be used with any colour or weight of yarn, and looks fabulous in variegated yarn.
For the purpose of this pattern, I have made a pram sized blanket (60x80cm), however the pattern can easily be adapted to make larger or smaller blanket using multiples of 6.
.png)
Materials Needed
- Approx 300g Yarn for the body, I used my Springtime Yarn Pack, but any DK weight yarn will do.
- Approx 50g of DK weight yarn in the colour of your choice for the edge, I used Scheepjes Colour Crafter in 1203 Heerenveen.
- 4mm Crochet Hook (for the body of the blanket)
- 3.5mm Crochet Hook (for the edging of the blanket)
- Tapestry Needle & Scissors
Stitches Used:
- Ch (chain)
- Dc (Double Crochet)
- Hdc (Half Double Crochet)
- Sc (Single Crochet)
- Ss (Slip Stitch)
Special Stitches Used:
- Fpdc (Front Post Double Crochet)
- Bpdc (Back Post Double Crochet)
- Reverse sc – Reverse Single Crochet (Also known as Crab Stitch)
Colour Scheme Notes:
I worked 6 repeats of my springtime yarn pack in the following order: 1020 Leiden, 1822 Delfzijl, 1422 Eelde, 1034 Urk, 1432 Heerlen, 1390 Amersfoort, 1241 Den Bosch, 1240 Ommen. The edge was worked in 1203 Heerenveen.
Blanket Body
[Please Note: For this section I have used Ch2 to start each row. This counts as the first stitch on all rows. If you wish to use ch3 or a standing dc then please feel free to do so]
Foundation Row: Using a 4mm hook, Ch 108 (to increase/decrease width – work in multiples of 6 stitches)
Row 1: dc in 3rd chain from hook and dc all the way to the end. Turn. (107 Stitches)
Row 2: Ch2 (counts as first stitch from now on – see photo for clarification), dc into next four stitches, *bpdc around next stitch from row below, dc into next 5 stitches* Repeat from * to * until the end of the row. You should end the row with 5 dc – making sure to work the final dc into the top of the ch turn from the previous row. Turn.
Row 3: Ch2, dc into next four stitches, *fpdc around fpdc from row below, dc into next 5 Stitches* Repeat until end of row. Turn.
Rest of blanket Body: Repeat rows 2 and 3 until blanket reaches desired length.
To Finish: Cut yarn and sew in ends.
Edging
[Please Note: Chain stitches in this section DO NOT count as the first stitch in the round]
Round 1:
- Switch to 3.5mm hook.
- Join with ss to any stitch along top row of blanket, ch1, sc in same stitch as ch1.
- Sc across top edge to second last stitch of row.
- 3 sc in corner stitch.
- Work sc along long edge (I like to work my stitches as follows: working 3 stitches across every 2 rows, but don’t feel tied to using this method)
- Work 3 sc into corner of bottom row
- sc along bottom row to end.
- 3 sc in corner stitch
- Work along the rest of the blanket in the same manner as above
- Join to top of first stitch in round with ss.
Round 2:
- Ch1 and hdc in same stitch.-
- Work hdc all around working 3 stitches into the middle sc from corner cluster of previous round. (shown right.)
- Join to first stitch in round with ss.
Round 3:
- Work in the same manner as Round 2.
Round 4:
- Ch1, sc in same stitch.
- Work sc all around, working 3 stitches into the middle stitch of the corner cluster from the previous round.
- Join with ss to top of first stich of round
Round 5:
- Ch1, work reverse sc all the way round the edge.
- DO NOT ss to first stitch in round. Instead:
- Cut yarn and sew end through first stitch in round, working from the front of the stitch through to the back, this will achieve a seamless join in your crab stitch edging.
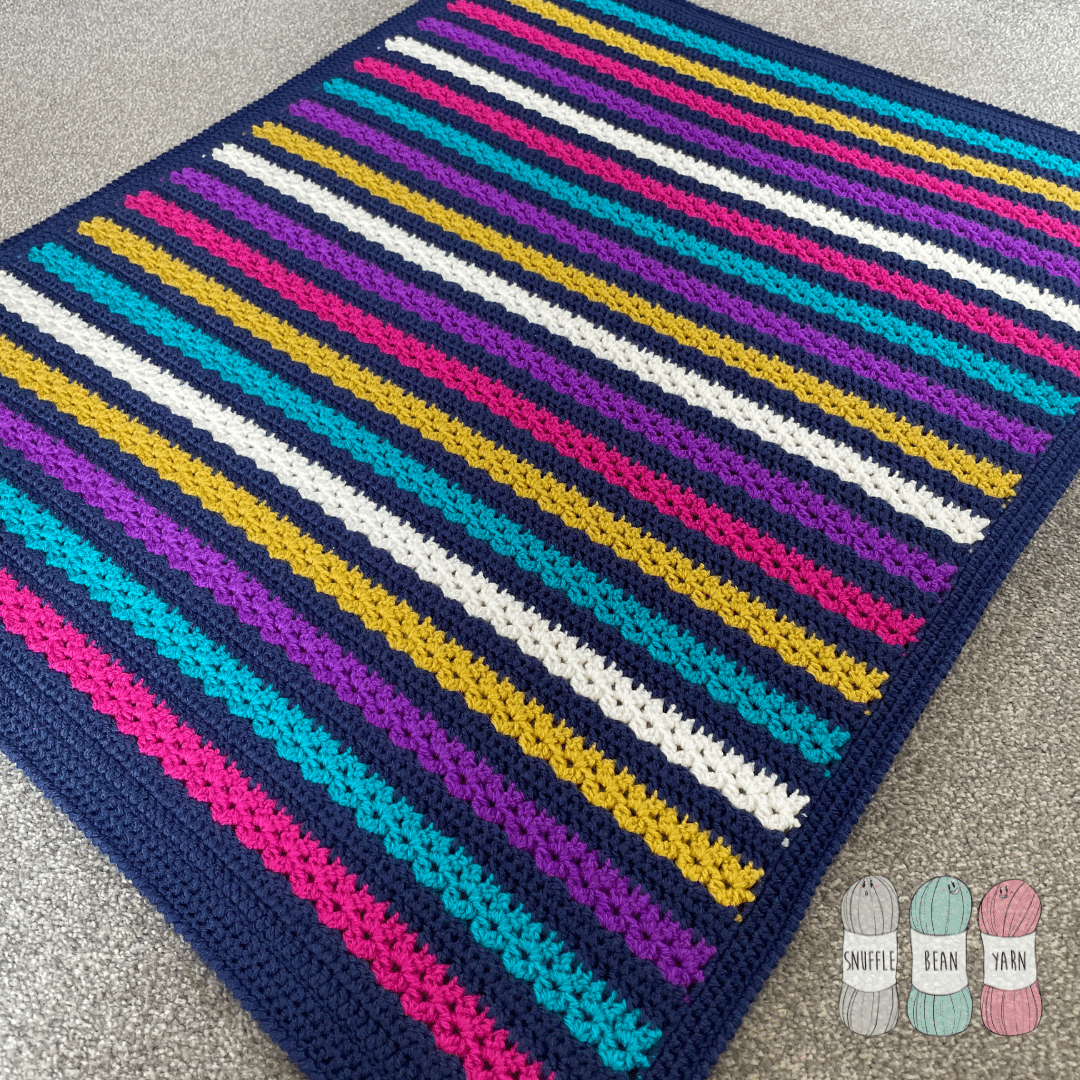
Ta dah!
You should now have a finished blanket resembling something like the blanket pictured below!

Video Tutorial:
If you’ve found this pattern helpful then why not leave a comment and say hi!
![How to Knit Basketweave Stitch [Free Written Pattern & Video Tutorial!]](https://www.snufflebean.co.uk/wp-content/uploads/2022/07/basketweave-social.png)
![How to Knit the “Springtime Stroll” Shawl [Free Knitting Pattern & Video Tutorial]](https://www.snufflebean.co.uk/wp-content/uploads/2026/02/winter-walk-5.png)
![How to Knit Granite Stitch [Free Video Tutorial & Written Pattern!]](https://www.snufflebean.co.uk/wp-content/uploads/2024/09/long-tail-wordpress-1.png)
![Easy Knit Diagonal Garter Stitch Scarf 🧶🧣 [Free Written Pattern & Video Tutorial!]](https://www.snufflebean.co.uk/wp-content/uploads/2023/01/diagonal-scarf-social.png)