How to Join Mitred Squares As You Go [Free Knitting Pattern & Video Tutorial!]
Knitted mitred squares are the ultimate cosy stash buster! Perfect for using up those little scraps of yarn left over from bigger projects.
These cute little squares are not only easy to knit, but they are easily scaled up or down and can be knitted in solid colours or stripes.
The possibilities are endless and if you knit from scraps then each blanket will be unique.
In this post I’m going to walk you through how to join squares as you go to save having to sew them together.
To make things easier, I’ve included a free video tutorial at the bottom of this post to guide you through the pattern step by step.
Perfect if you’re a visual learner or just like having a bit of extra guidance alongside the written instructions.
Pin for Later
Easily find this blog post in the future by pinning the image below!

Written Pattern
In order to join as you go, you first need to work a standalone mitred square like the one pictured below.
I have a separate post that covers this and you can find it by CLICKING HERE
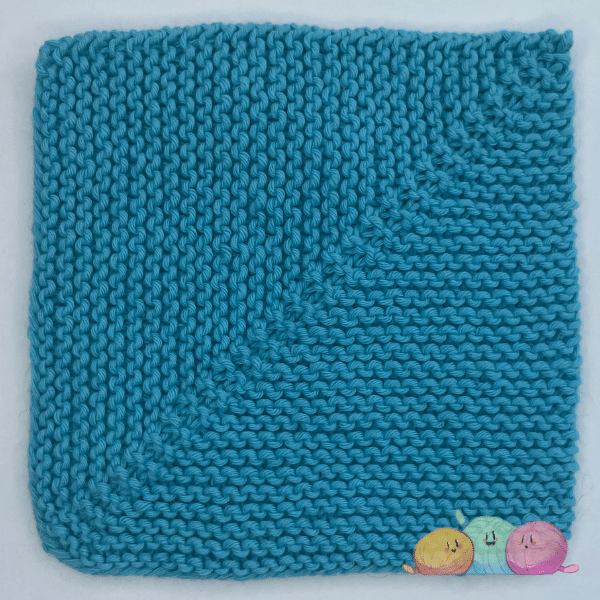
You only need to work this square once, and all the remaining squares in your blanket will be joined as you go using one of the 3 methods in this post.
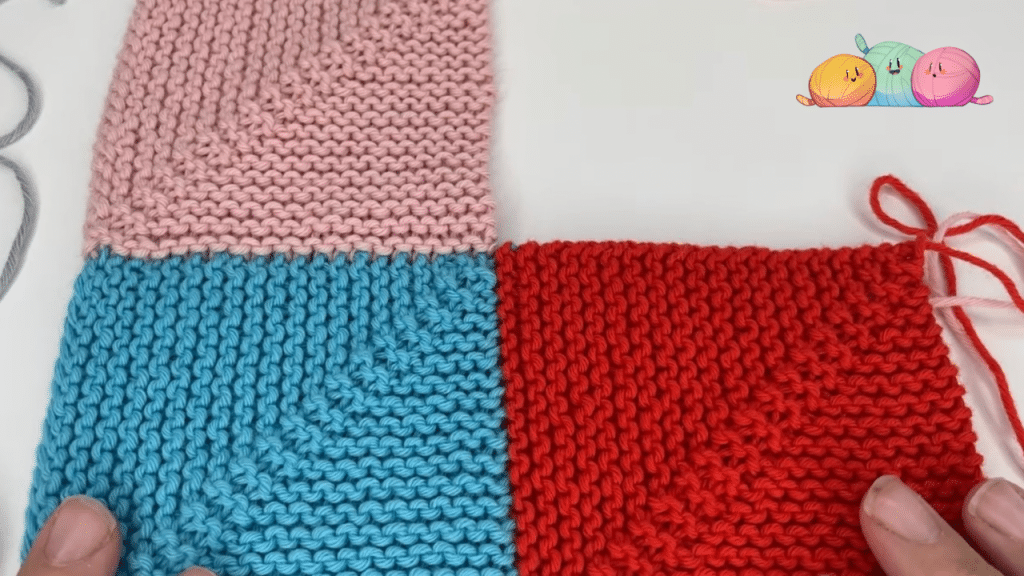
adding a square to the right edge.
Cast on ONE STITCH less than your total square size (i.e. – if base square is 40 stitches, cast on 19 stitches).
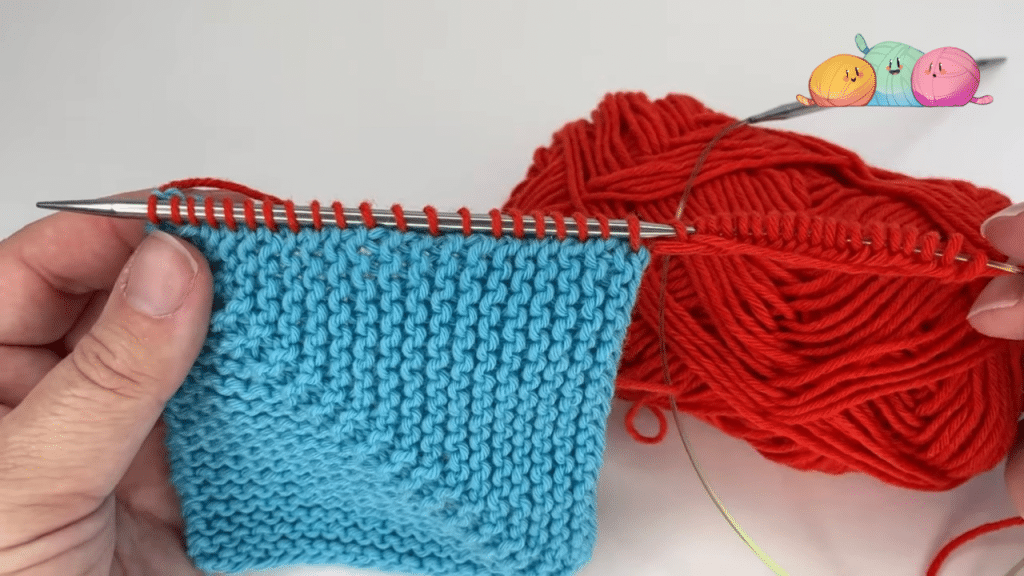
Pick up the remaining stitches from the right hand edge of the square you are attaching to (this should be 1 more stitch than you just cast on). You will be picking up stitches in between your garter bumps (see video if needed)
The rest of the square is worked in the same way as the standalone mitred square (Click HERE for pattern)
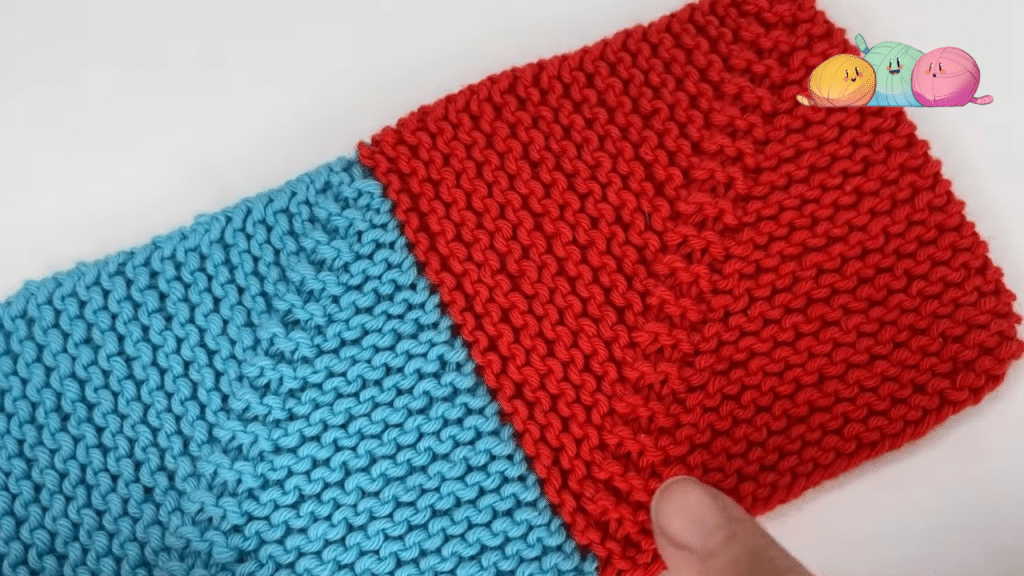
Your finished square should resemble the red square below, the blue square to the left is the original standalone square that starts any mitred square blanket.
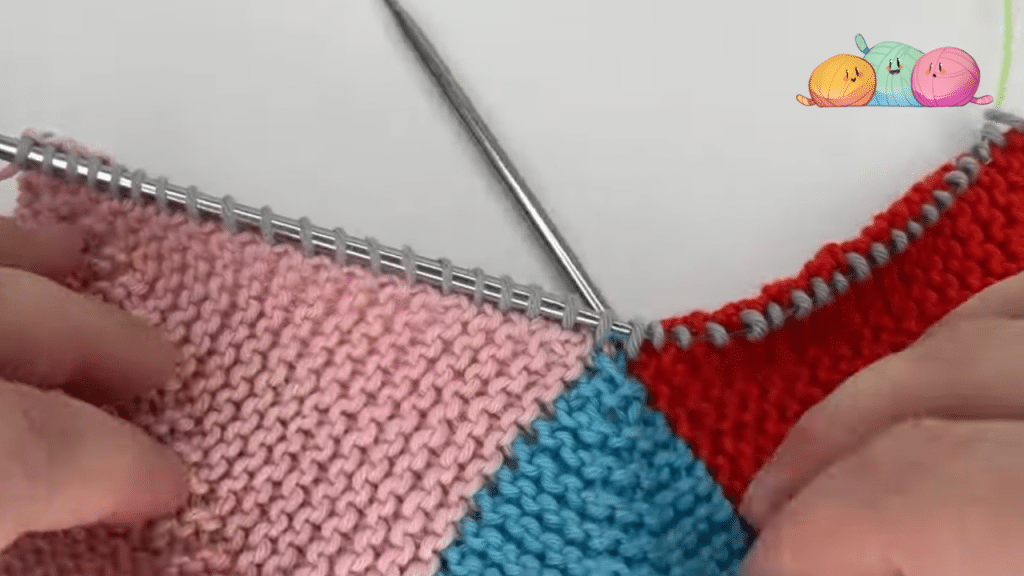
adding a square to the top edge.
With right side facing, work from right to left and pick up stitches so that you have a total of 1 stitch more than half of your original square (i.e. – if base square is 40 stitches, pick up 21 stitches). You will be picking up stitches in between your garter bumps (see video if needed)
NOTE: Before starting your knitted cast on you will need to turn your work so that your needle with the picked up stitches is in your left hand.
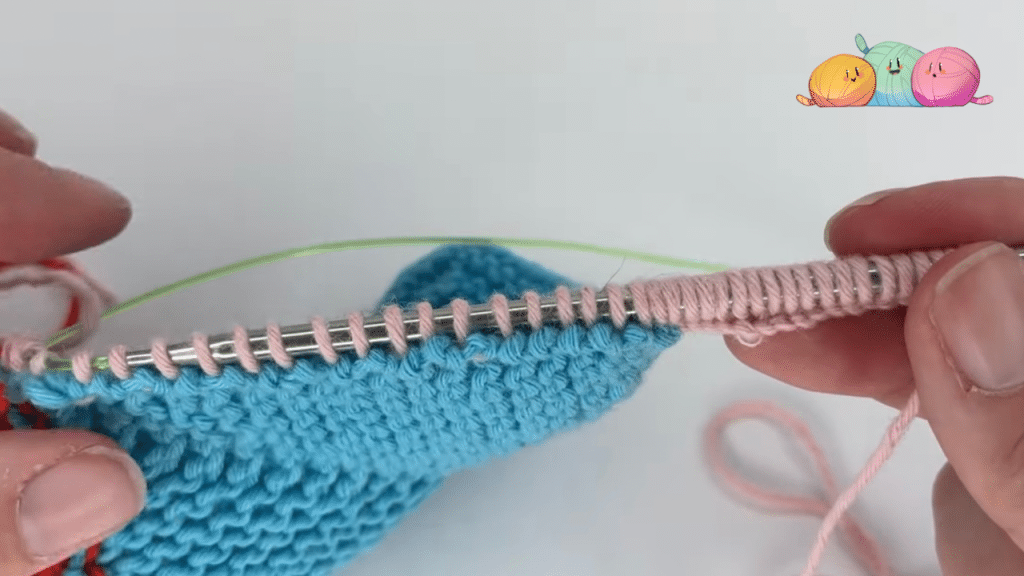
Using knitted cast on – cast on remaining stitches (this should be one less than you just picked up. You will not need to turn your work before starting row 1 of your square.
The rest of the square is worked in the same way as the standalone mitred square.
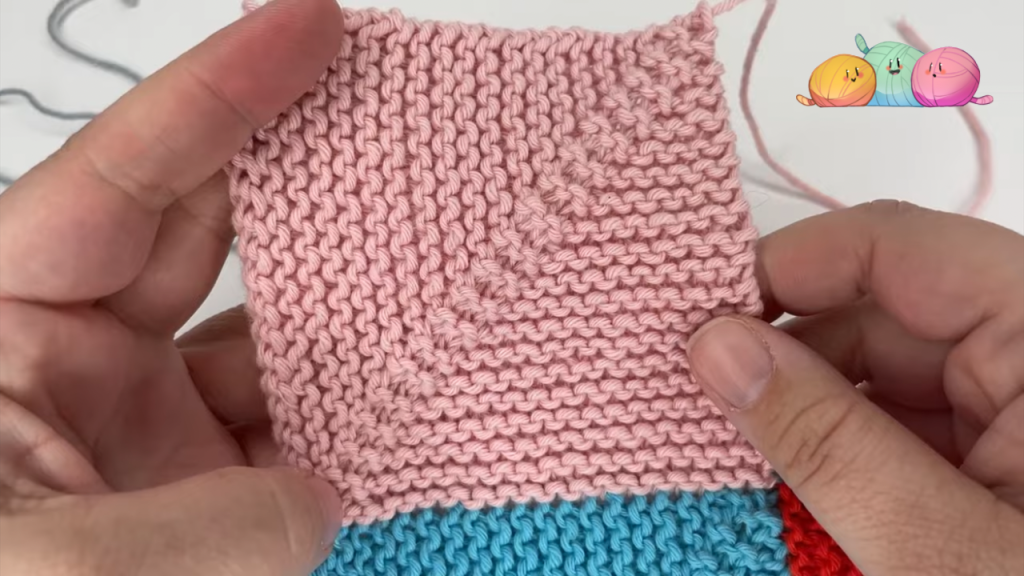
Your finished square should look like the pink square below:
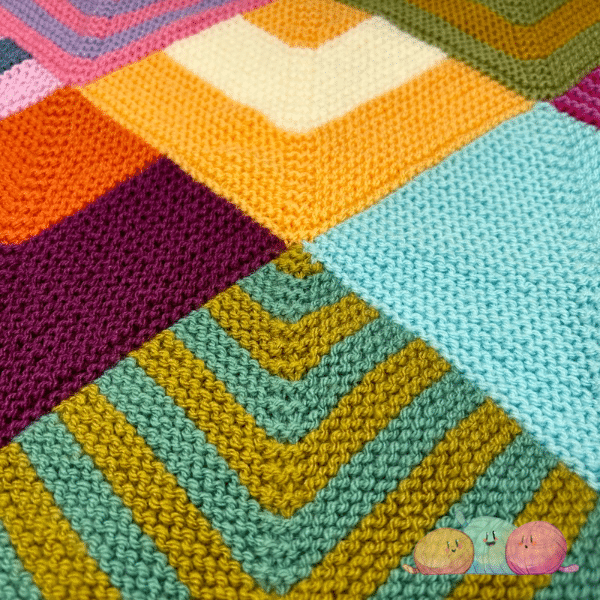
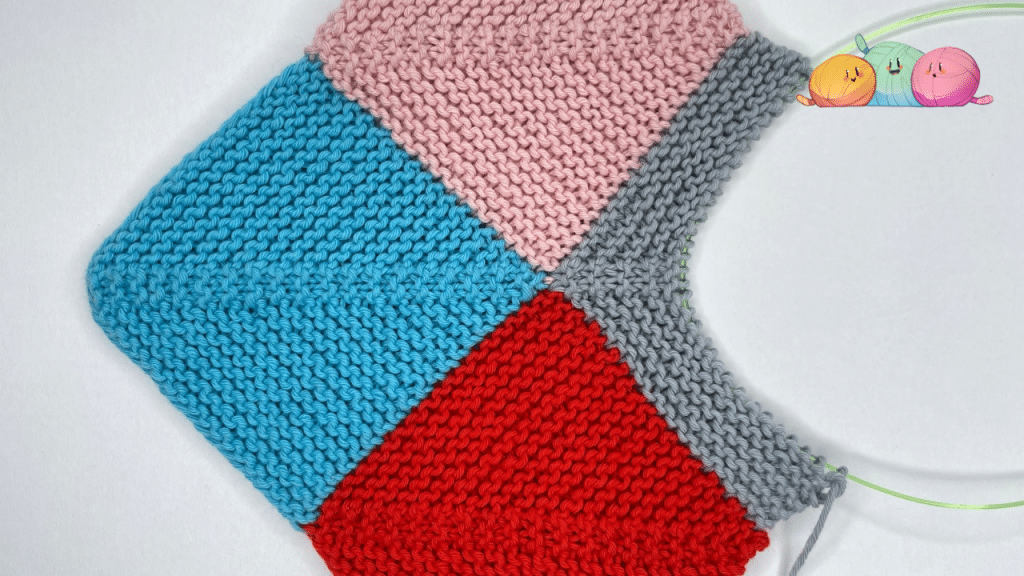
how to join a square to two edges
You should be working into a “L” Shaped space created by a square below where you are working, and a square to the left of where you are working. You will be picking up stitches in between your garter bumps (see video if needed)
With right side facing, pick up half your stitches from the square below where you are working (in my case that’s the red square)
(i.e. – if base square is 40 stitches, pick up 20 stitches). You will be picking up stitches in between your garter bumps (see video if needed)

Pick up remaining half of stitches from the square to the left of the square you are creating (in my case that is the pink square)
The rest of the square is worked in the same way as the standalone mitred square (don’t forget to turn your work before starting your first row)
Building the rest of the blanket
Building a mitred square blanket is simpler than it may seem.
You will now need to keep adding squares to add length/width by adding a square to the right, or a square above. The bulk of the blanket is created using by filling in the gaps created by the first two types of square using the method that requires you to join a square to the “L” shaped gap the other two squares create.
If you struggle to visualise this, then try to remember that a bigger blanket is really just a scaled up version of my four initial squares, and you’ll want to grow the remainder in exactly the same way you worked those three first squares you joined.
And that’s not all!
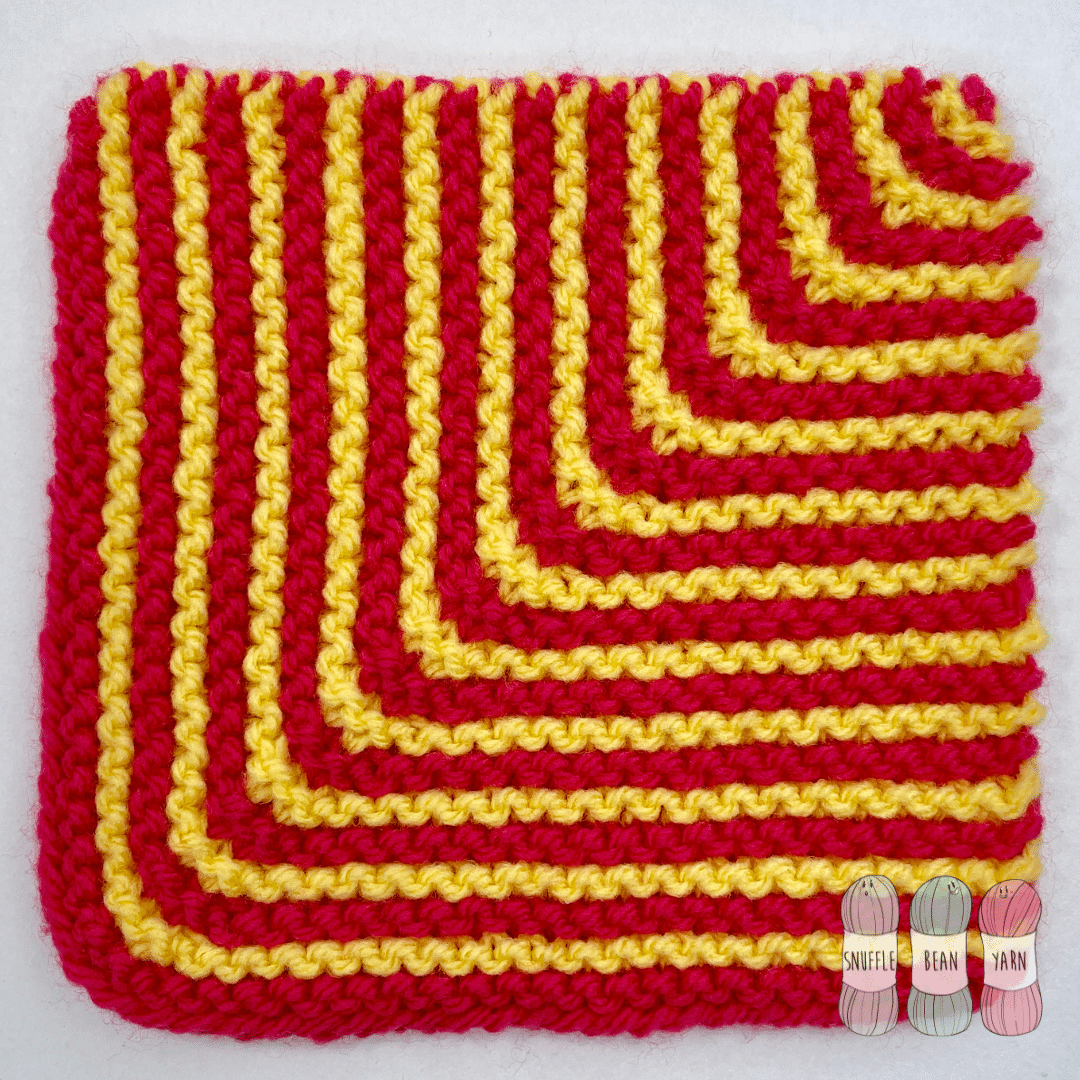
Once you’ve mastered knitting and joining solid coloured mitred squares, why not give striped mitred squares a go!

You join them in exactly the same way, and you can learn how to knit them by CLICKING HERE.
Happy Knitting!
![How to Knit the “Gracie” Baby Blanket [Free Video Tutorial & Written Pattern!]](https://www.snufflebean.co.uk/wp-content/uploads/2024/09/long-tail-wordpress-1-1.png)
![How to Knit Double Andalusian Stitch [Free Video Tutorial & Written Pattern!]](https://www.snufflebean.co.uk/wp-content/uploads/2023/09/double-Andalusian-Social.png)
![How to Knit a Ridged Mitred Square [free knitting pattern and video tutorial]](https://www.snufflebean.co.uk/wp-content/uploads/2025/07/cluster-v4-1-1.png)
![How to Knit the Seersucker Stitch [Free Video Tutorial & Written Pattern!]](https://www.snufflebean.co.uk/wp-content/uploads/2023/02/seersucker-social.png)
![How to Knit the “In Fours” Baby Blanket [Free Knitting Pattern & Video Tutorial!]](https://www.snufflebean.co.uk/wp-content/uploads/2023/03/in-fours-social.png)