How to Knit Jute stitch – Free Knitting Pattern & Video Tutorial!
Lately I’ve been really enjoying discovering stitch patterns that use techniques other than just knit and purl stitches (Garter Slip Stitch and Open Star Stitch are a couple I’ve recently covered)
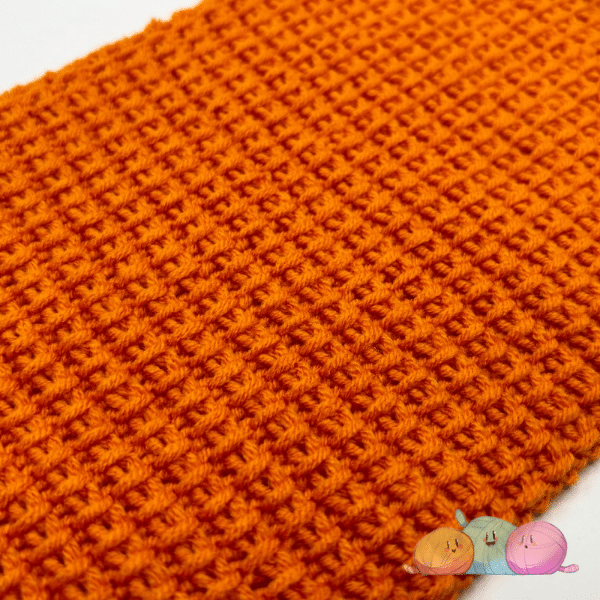
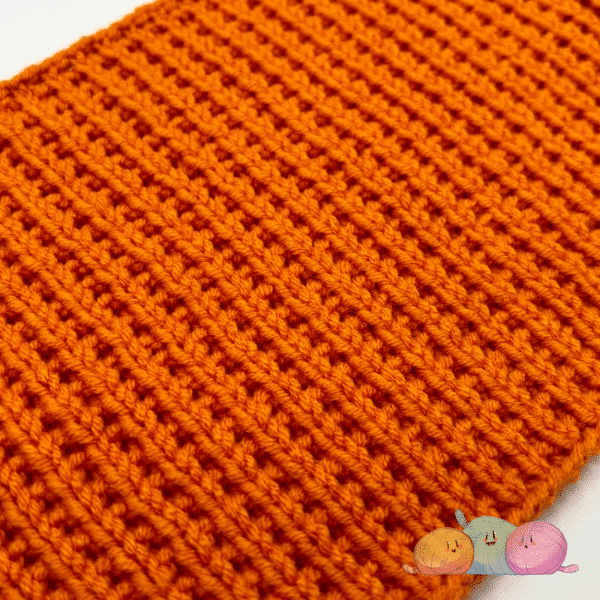
Jute Stitch cleverly uses slipped stitches and the working yarn to create a textured piece of knitting that has a distinctive style that I haven’t seen in any other stitch pattern.
At just a two row repeat, its easy for beginners to pick up and even though it uses slip stitches to create texture, the technique is easy to learn and I cover things in nice simple steps in the video that accompanies this written pattern.
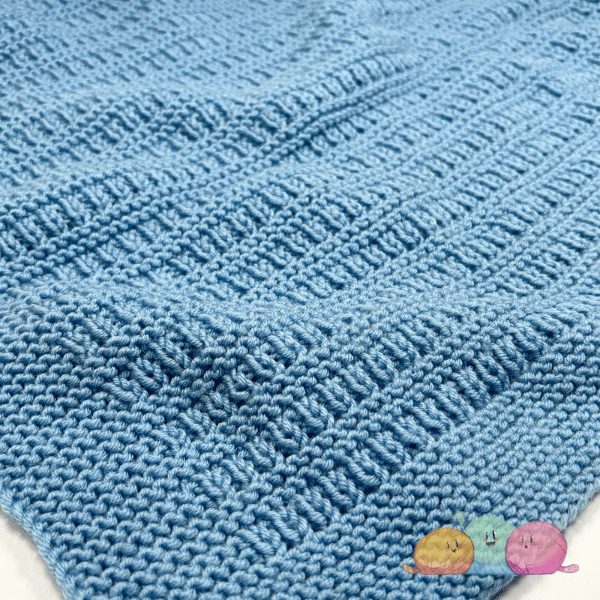
In the interests of openness, it’s important to note that Jute Stitch has a real urge to curl inwards at the sides.
Normally I find a simple garter stitch selvedge will sort this and help a piece lay flat, but in the case of Jute Stitch even this wasn’t enough.
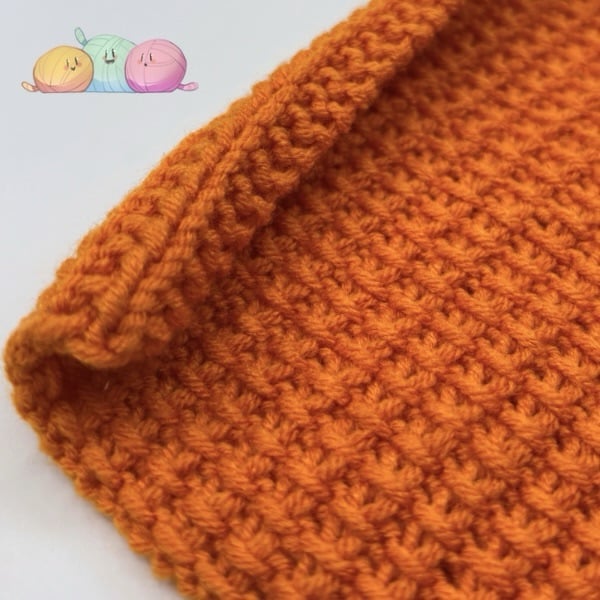
I would therefore suggest that when you’re knitting Jute Stitch, that alongside adding some side edging, you also work a garter stitch edge top and bottom, as this should help your finished item to lay nice and flat.
I’m sure blocking a piece will also help, but I deliberately left my sample unblocked so I could show you how this stitch pattern can behave.
Is this a reversible stitch pattern?
Whenever I produce a knitting tutorial, or a baby blanket pattern, I’m always being asked if its reversible or not. Hopefully having a little section to cover this question within my blog posts will help to answer that question nice and quickly.
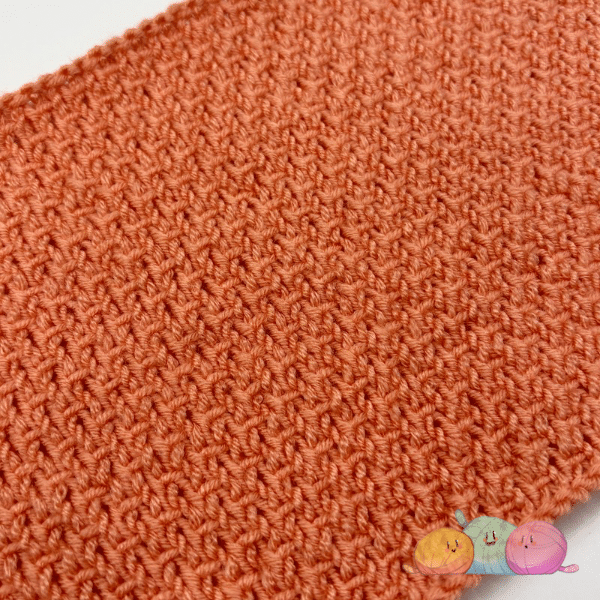
The Jute Stitch isn’t a reversible pattern, it has a definite right and wrong side. This means it isn’t a stitch to use if you’re wanting a reversible knitting project.
That being said, the reverse isn’t ugly, or messy. The photo below shows how the reverse of this stitch looks:
I’m a big fan of non reversible stitches, I don’t like the constraints that keeping a project reversible puts on my creative mind. You’ll see me using lots of stitch patterns that have a definite right and wrong side, but I’m yet to find one that looks messy or ugly on the reverse side.
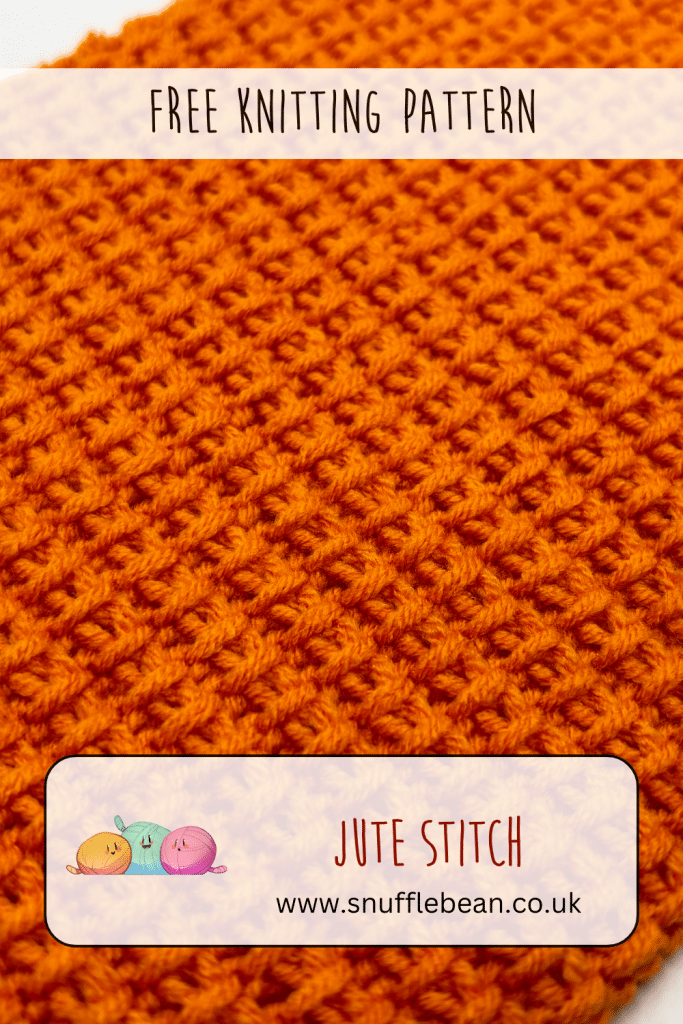
Pin for later
Written pattern
Stitches Used
- K – knit
- P – Purl
- WS – Wrong Side
- RS – Right Side
pattern repeat
Foundation Row: Cast on an ODD number of stitches. (I like to use the Long Tail method)
Row 1 (RS): p1, *sl1pwyf, p1* repeat from *to* until end of row.
Row 2 (WS): k1, *p1, k1* repeat from *to* until end of row.
Repeat these two rows until your project is the size you want, then cast off in pattern on a wrong side row.
![How to Knit Spiral Diagonal Rib Stitch [Free Video Tutorial & Written Pattern!]](https://www.snufflebean.co.uk/wp-content/uploads/2024/10/Spiral-Diagonal-WordPress.jpg)
![How to Knit the “Willow” Baby Blanket [Free Video Tutorial & Written Pattern!]](https://www.snufflebean.co.uk/wp-content/uploads/2024/02/Willow-Social-2.png)
![How to Knit the “Hannah” Baby Blanket [Free Video Tutorial & Written Pattern!]](https://www.snufflebean.co.uk/wp-content/uploads/2024/04/Hannah-2-WordPress.jpg)